
简述
这里使用 Let’s Encrypt 的免费证书
- certbot 官网
- 在页面上选择一下你用的 Web 服务器和操作系统。比如,我选的 Nginx 和 Centos 7
- 根据页面提示操作,以下为详细步骤。
详细步骤
- 进入官网后下方会出现选择服务器和系统版本界面,选完后会自动生成操作步骤

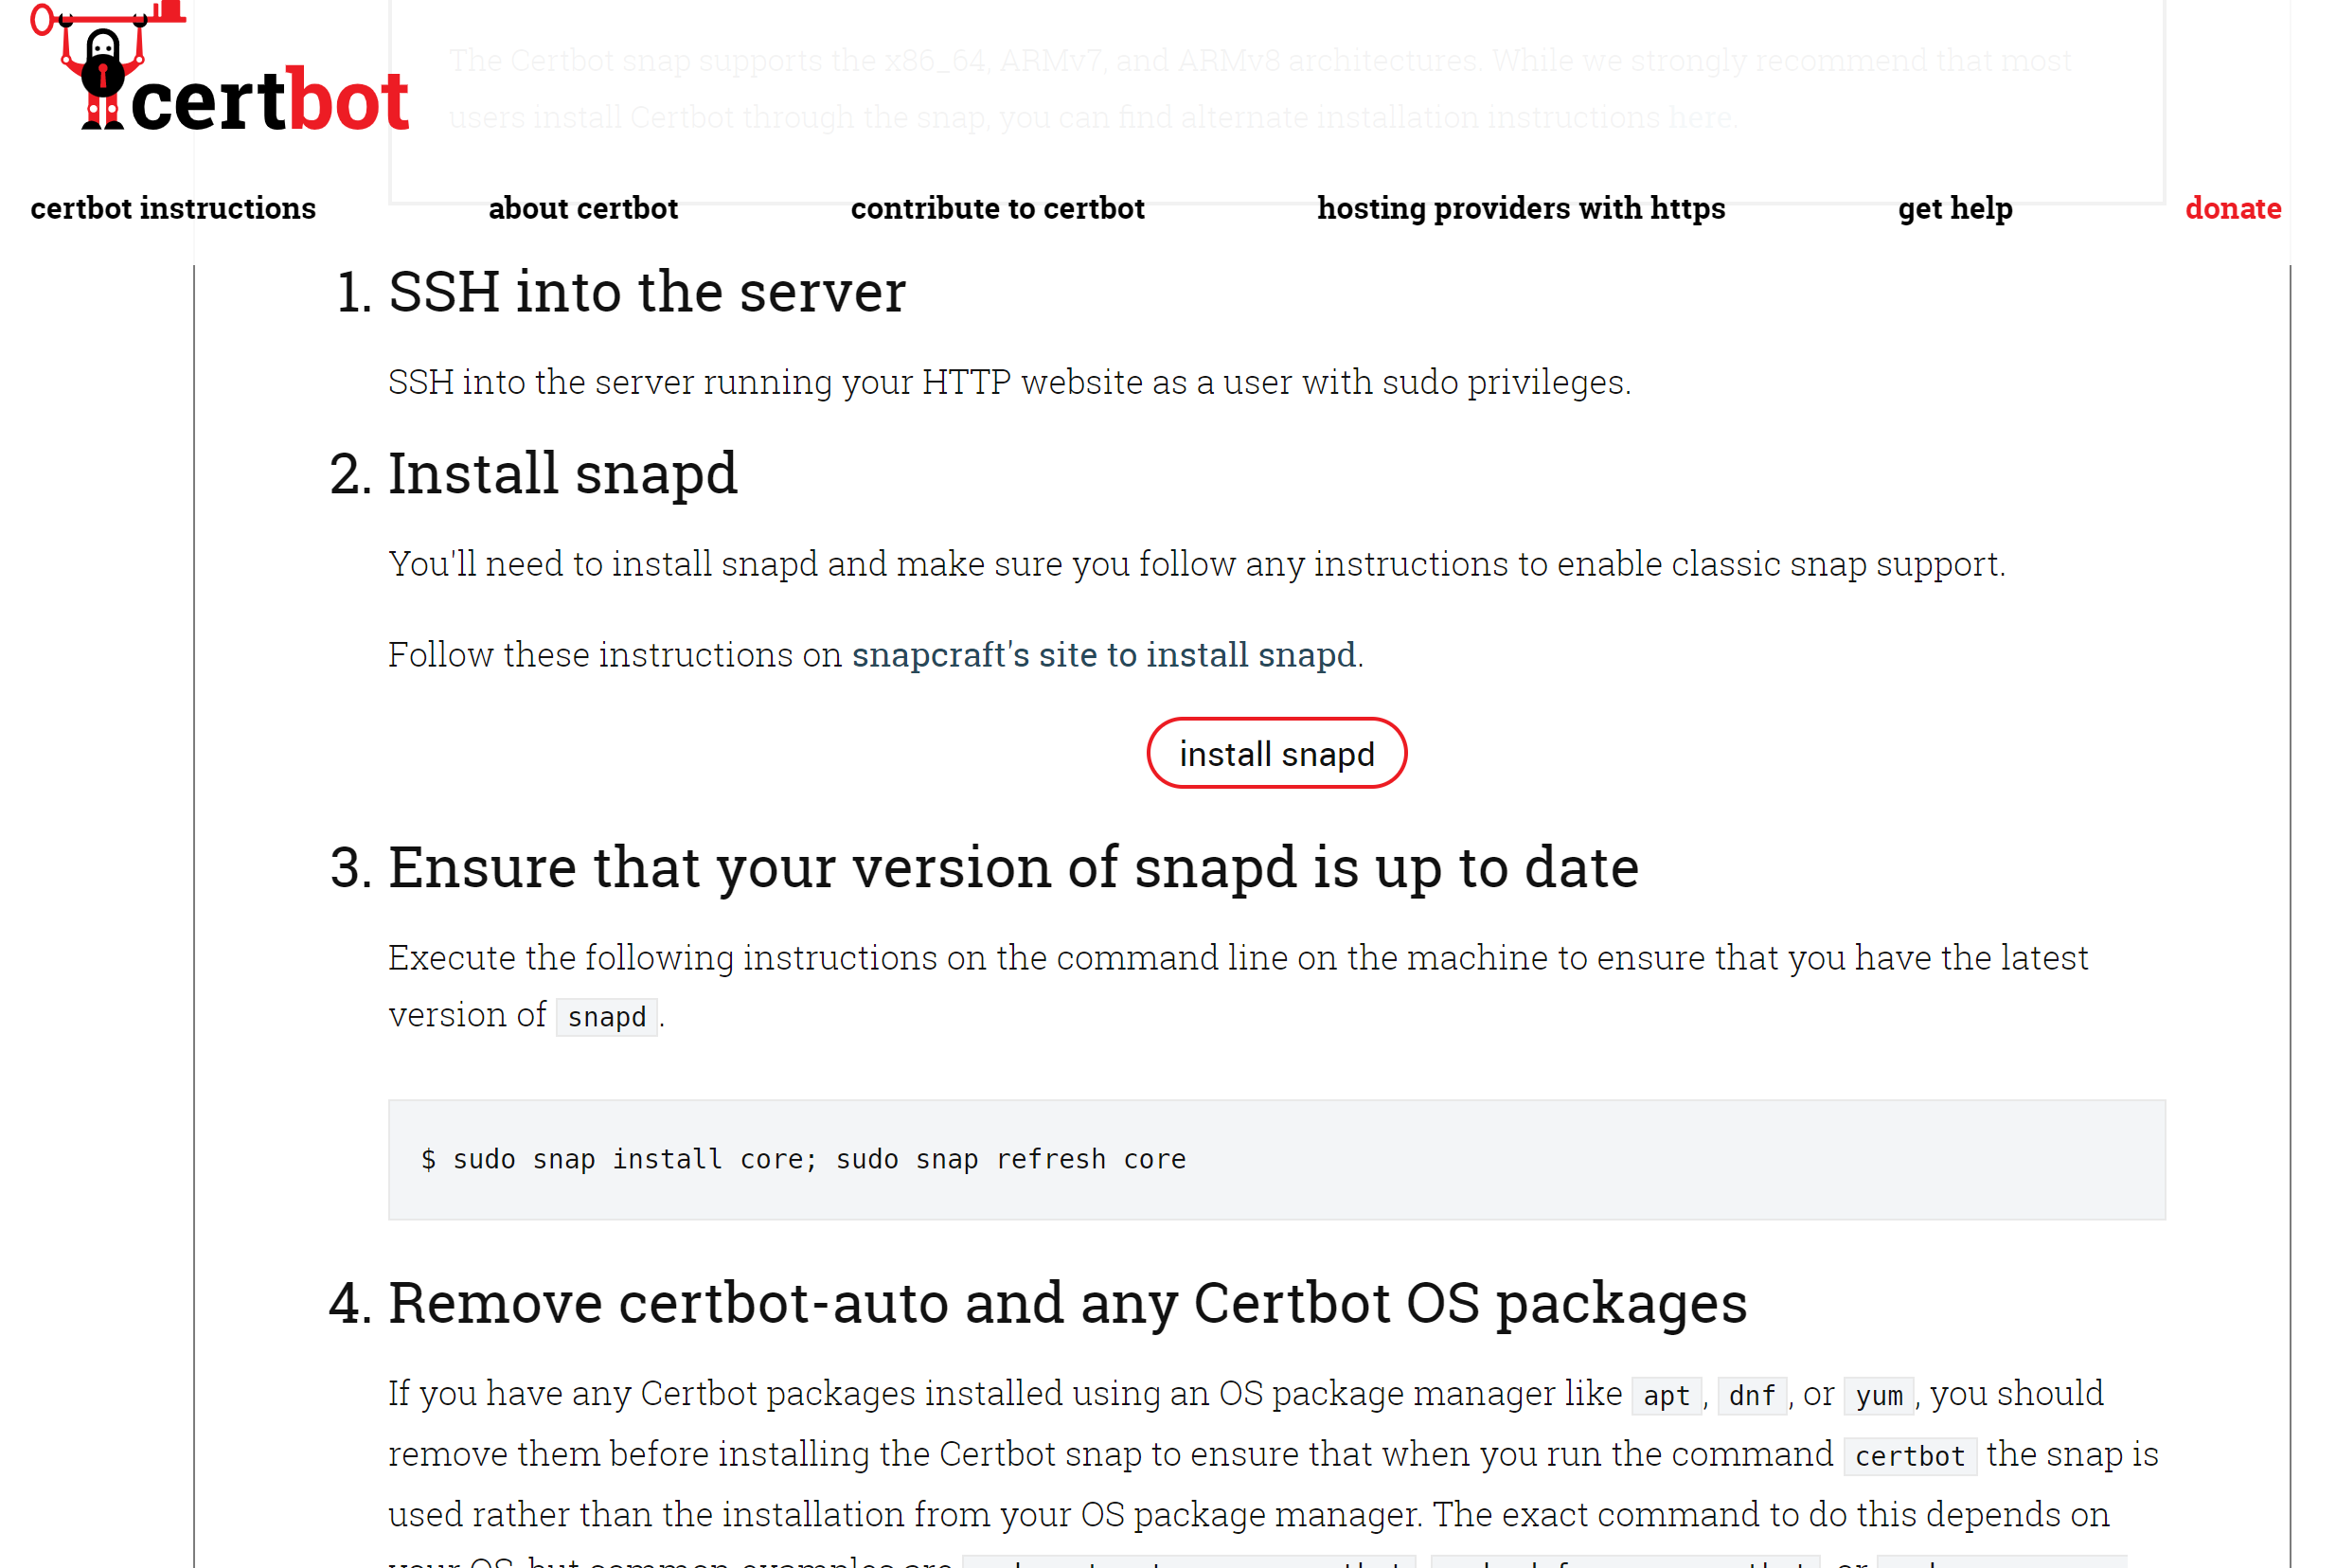
- 在安装
certbot之前需要先安装snapd, 点击 install snapd 进入
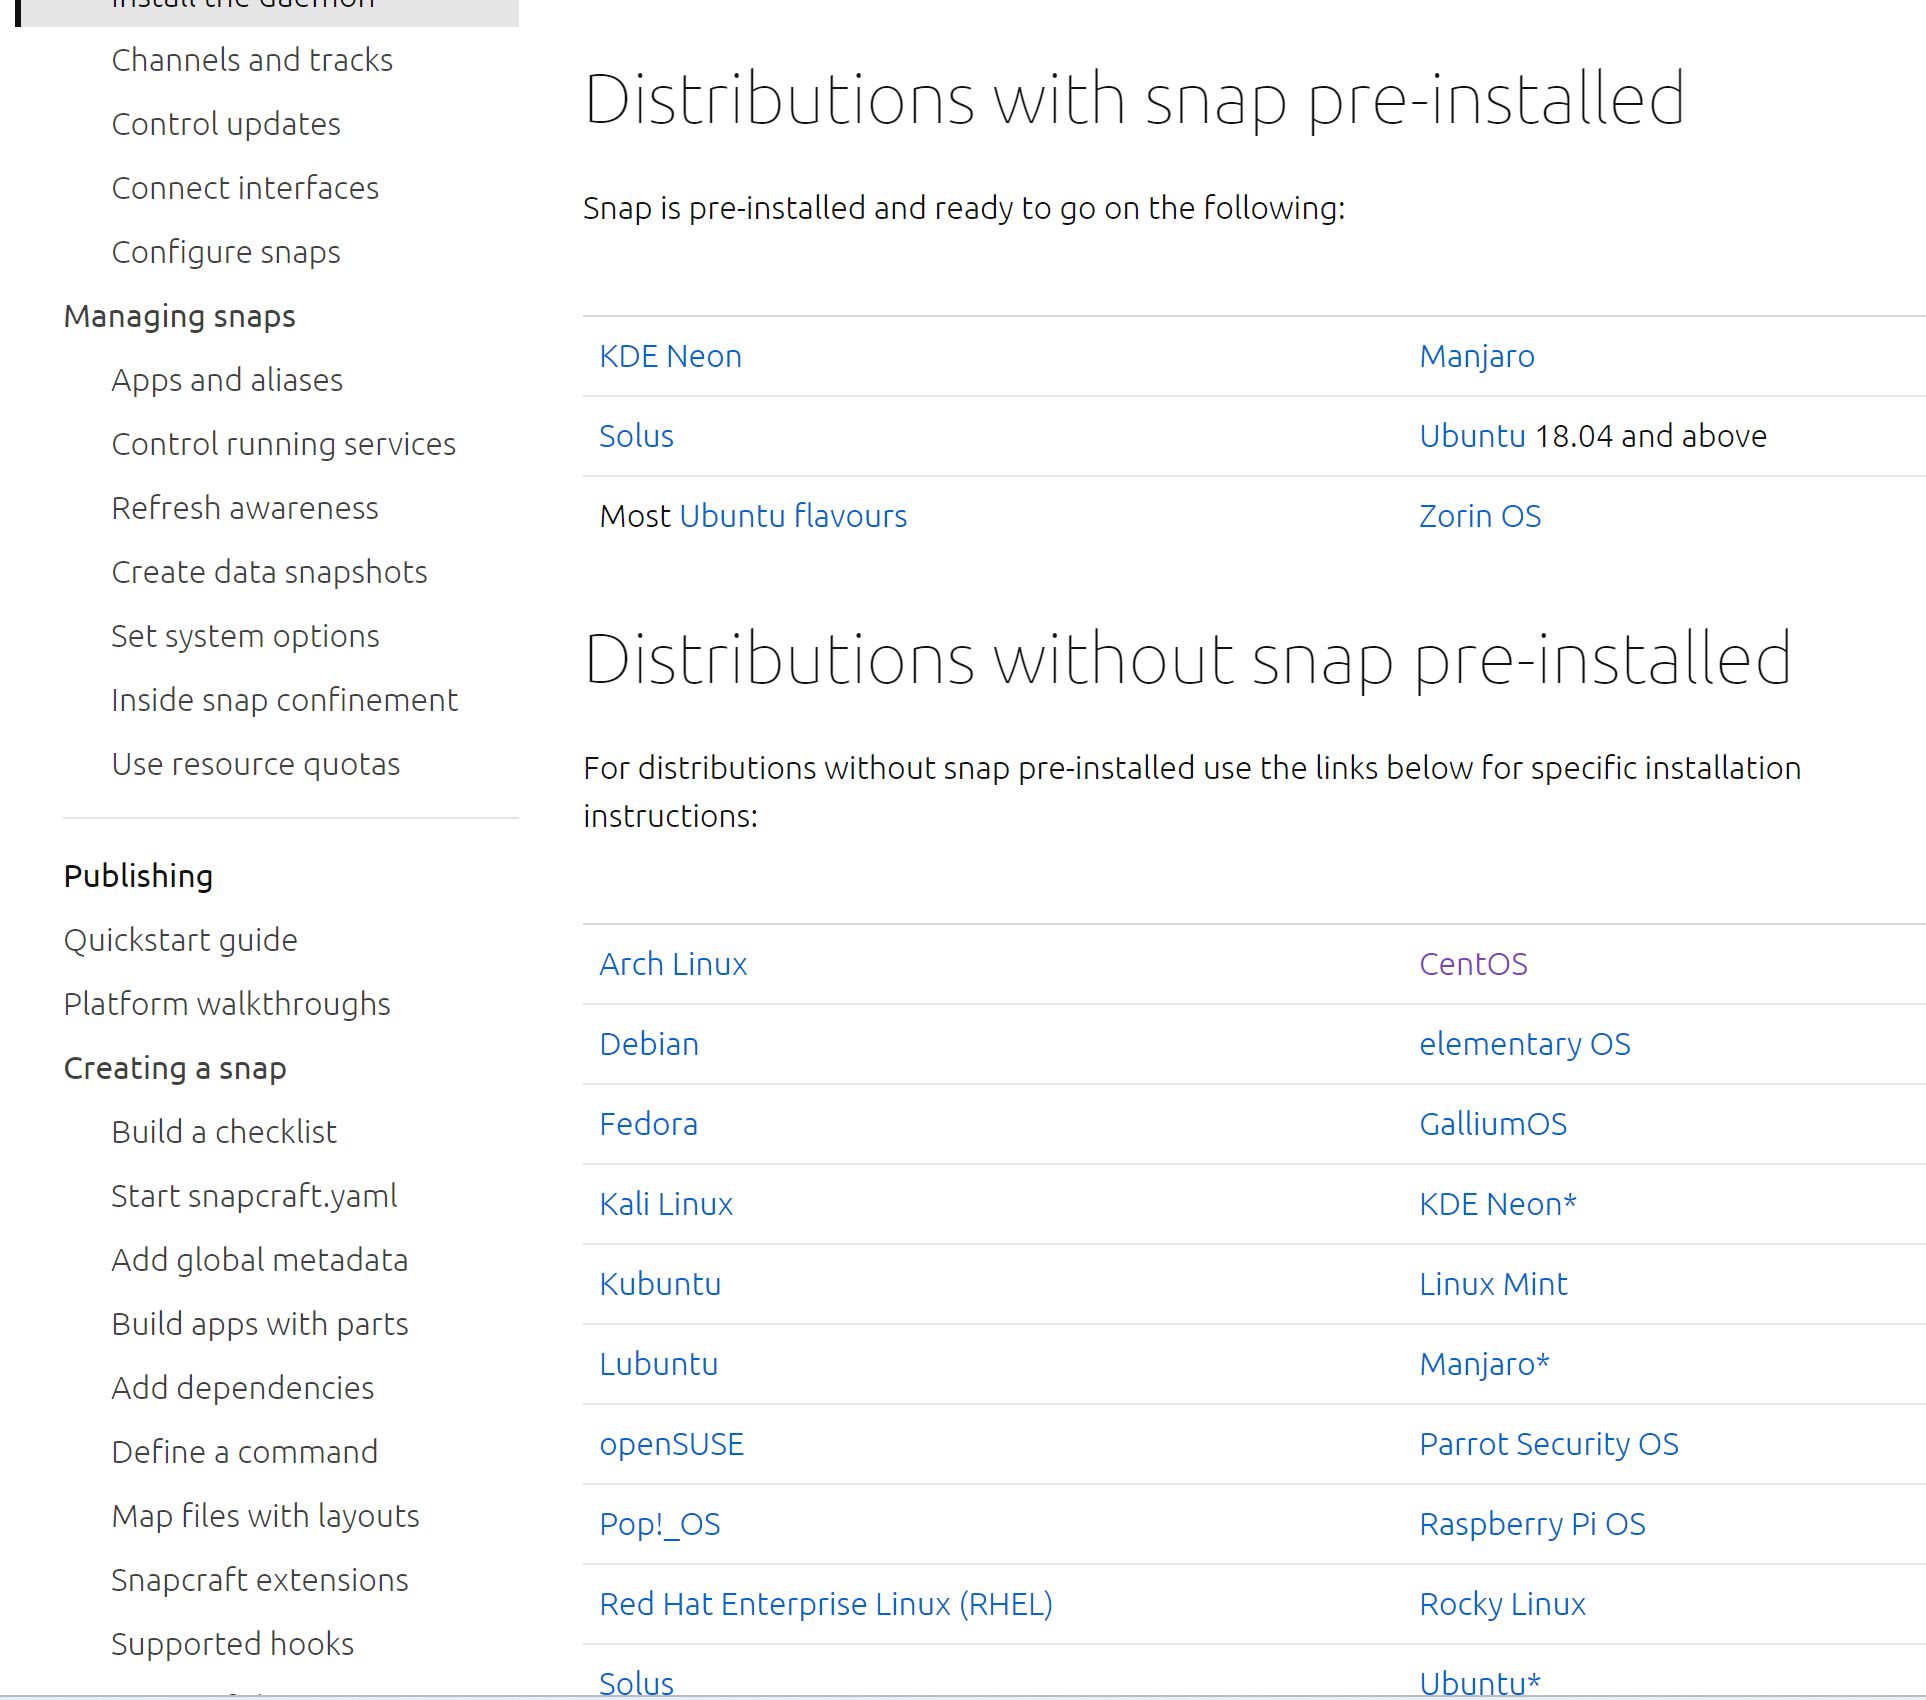
- 这里选择
CentOS点击进入 安装 snapd 教程 ,命令汇总下方
# 安装 epel
sudo yum install epel-release

# 安装 snapd
sudo yum install snapd

# 设置系统自启 snap socket
sudo systemctl enable --now snapd.socket

# 设置软连接
sudo ln -s /var/lib/snapd/snap /snap- 更新 snap core
sudo snap install core
sudo snap refresh core- 安装 certbot
sudo snap install --classic certbot- 创建执行命令
sudo ln -s /snap/bin/certbot /usr/bin/certbot- 这里提供两种方式
# 1.获取并安装证书:运行此命令以获取证书,并让Certbot自动编辑的nginx配置。
sudo certbot --nginx

# 2.只是获得证书,手动更改nginx配置
sudo certbot certonly --nginx
安装的时候有报错:
The nginx plugin is not working; there may be problems with your existing configuration.
The error was: NoInstallationError("Could not find a usable 'nginx' binary. Ensure nginx exists, the binary is executable, and your PATH is set correctly.")
是因为没有将 nginx 放到环境变量中,需要设置 nginx 软连接:
ln -s /usr/local/nginx/sbin/nginx /usr/bin/nginx
ln -s /usr/local/nginx/conf/ /etc/nginx
当使用
which nginx时,报错:
执行which nginx显示如下
/usr/bin/which: no nginx in (/usr/local/sbin:/usr/local/bin:/sbin:/bin:/usr/sbin:/usr/bin:/root/bin)
说明在 (/usr/local/sbin:/usr/local/bin:/sbin:/bin:/usr/sbin:/usr/bin:/root/bin) 这些路径下都没有nginx的可执行文件,所以执行不了which,解决办法也可以采取上面的解决方案
这里使用第一种方式
sudo certbot --nginx
提示输入邮箱,回车后会出现两个协议:
1.是否同意他们的服务协议,选择 “Y”。
2.是否共享邮箱给他们提供推广等,选择 “N”。
certbot 会自动检查到 nginx.conf 下的配置,把所有的虚拟站点都列出来,然后选择需要开启 https 的站点。输入列表编号(用空格分开),然后,certbot 就下载证书并更新 nginx.conf 了。
打开 nginx.conf 文件,发现已经被添加了代码
    listen 443 ssl; # managed by Certbot
    ssl_certificate /etc/letsencrypt/live/fushengyicheng.com/fullchain.pem; # managed by Certbot
    ssl_certificate_key /etc/letsencrypt/live/fushengyicheng.com/privkey.pem; # managed by Certbot
    include /etc/letsencrypt/options-ssl-nginx.conf; # managed by Certbot
    ssl_dhparam /etc/letsencrypt/ssl-dhparams.pem; # managed by Certbot
和
    server {
    if ($host = fushengyicheng.com) {
        return 301 https://$host$request_uri;
    } # managed by Certbot

        listen       80;
        server_name  fushengyicheng.com;
    return 404; # managed by Certbot

}- 测试自动续订
Let’s Encrypt 的证书90天过期,这里 certbot 会提供续订命令,这里验证是否生效,只要看到有文件即可,无需修改。
sudo certbot renew --dry-run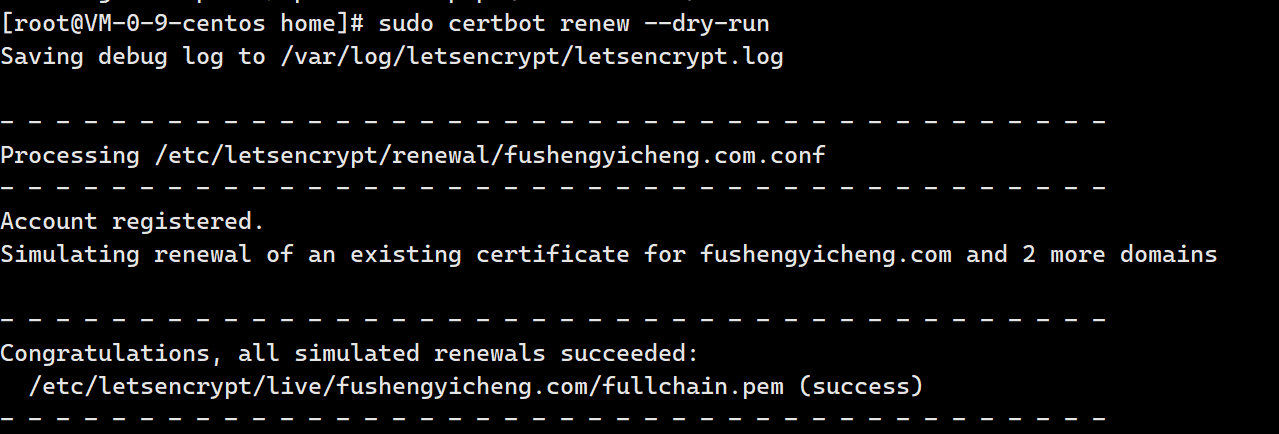
设置上自动化的更新脚本,使用 crontab 增加定时任务,每个月更新一下,使用 crontab -e 命令加入如下的定时作业
crontab -e
0 0 1 * * /usr/bin/certbot renew --force-renewal
5 0 1 * * /usr/sbin/service nginx restart
crontab 中有六个字段,其含义如下:
第1个字段:分钟 (0-59)
第2个字段:小时 (0-23)
第3个字段:日期 (1-31)
第4个字段:月份 (1-12 [12 代表 December])
第5个字段:一周当中的某天 (0-7 [7 或 0 代表星期天])
/path/to/command – 计划执行的脚本或命令的名称
以上 https 证书添加完毕
配置 HTTP2
HTTP2具有更快的HTTPS传输性能 HTTPS、SPDY 和 HTTP/2 的简单性能比较
HTTP2 要求 nginx 版本要大于 1.9.5开启 HTTP/2 其实很简单,只需要在 nginx.conf 的 listen 443 ssl; 后面加上 http2 就好了
    listen 443 ssl http2; # managed by Certbot
    ssl_certificate /etc/letsencrypt/live/fushengyicheng.com/fullchain.pem; # managed by Certbot
    ssl_certificate_key /etc/letsencrypt/live/fushengyicheng.com/privkey.pem; # managed by Certbot
    include /etc/letsencrypt/options-ssl-nginx.conf; # managed by Certbot
    ssl_dhparam /etc/letsencrypt/ssl-dhparams.pem; # managed by Certbot
然后重新加载 Nginx 就好了
nginx -s reload
如果报错
nginx: [emerg] the "http2" parameter requires ngx_http_v2_module in /usr/local/nginx/conf/nginx.conf:138
是因为 nginx 开启 HTTP/2 需要安装 ngx_http_v2_module 才可以开启,而 nginx 默认是没有安装该模块,需要我们手动安装一下,进入原来的 nginx 源码目录,如果找不到,可以去下载最新的 源码并进入
配置新增 nginx 的 http2 模块
ngx_http_v2_module模块
# 若找不到之前的源码目录
wget http://nginx.org/download/nginx-1.17.10.tar.gz
tar zxvf nginx-1.17.10.tar.gz
cd nginx-1.17.10
ls
# 除了nginx -V的输入信息原有的模块之外,新增--with-http_v2_module
./configure --prefix=/usr/local/nginx --conf-path=/usr/local/nginx/conf/nginx.conf --with-http_stub_status_module --with-http_gzip_static_module --with-http_ssl_module --with-http_v2_module
配置新增ngx_http_v2_module模块
在配置新增模块结束后,执行make重新编译
makemake好了之后会在源码目录 nginx-1.17.10 下的 objs 目录产生 nginx 的二进制文件
为了避免出现异常,先备份原来的 nginx 文件
cp /usr/local/nginx/sbin/nginx /usr/local/nginx/sbin/nginx.old20221127拷贝新编译的二进制覆盖原nginx二进制
nginx -s stop
cp objs/nginx /usr/local/nginx/sbin/nginx
源码目录根目录下,执行更新安装命令
/usr/local/nginx/sbin/nginx
make upgrade
查看信息
nginx -V
nginx version: nginx/1.17.10
built by gcc 4.8.5 20150623 (Red Hat 4.8.5-44) (GCC)
built with OpenSSL 1.0.2k-fips  26 Jan 2017
TLS SNI support enabled
configure arguments: --prefix=/usr/local/nginx --conf-path=/usr/local/nginx/conf/nginx.conf --with-http_stub_status_module --with-http_gzip_static_module --with-http_ssl_module --with-http_v2_module
完成以上操作,则增加了 http2
现在可以在 nginx.conf 中加入配置
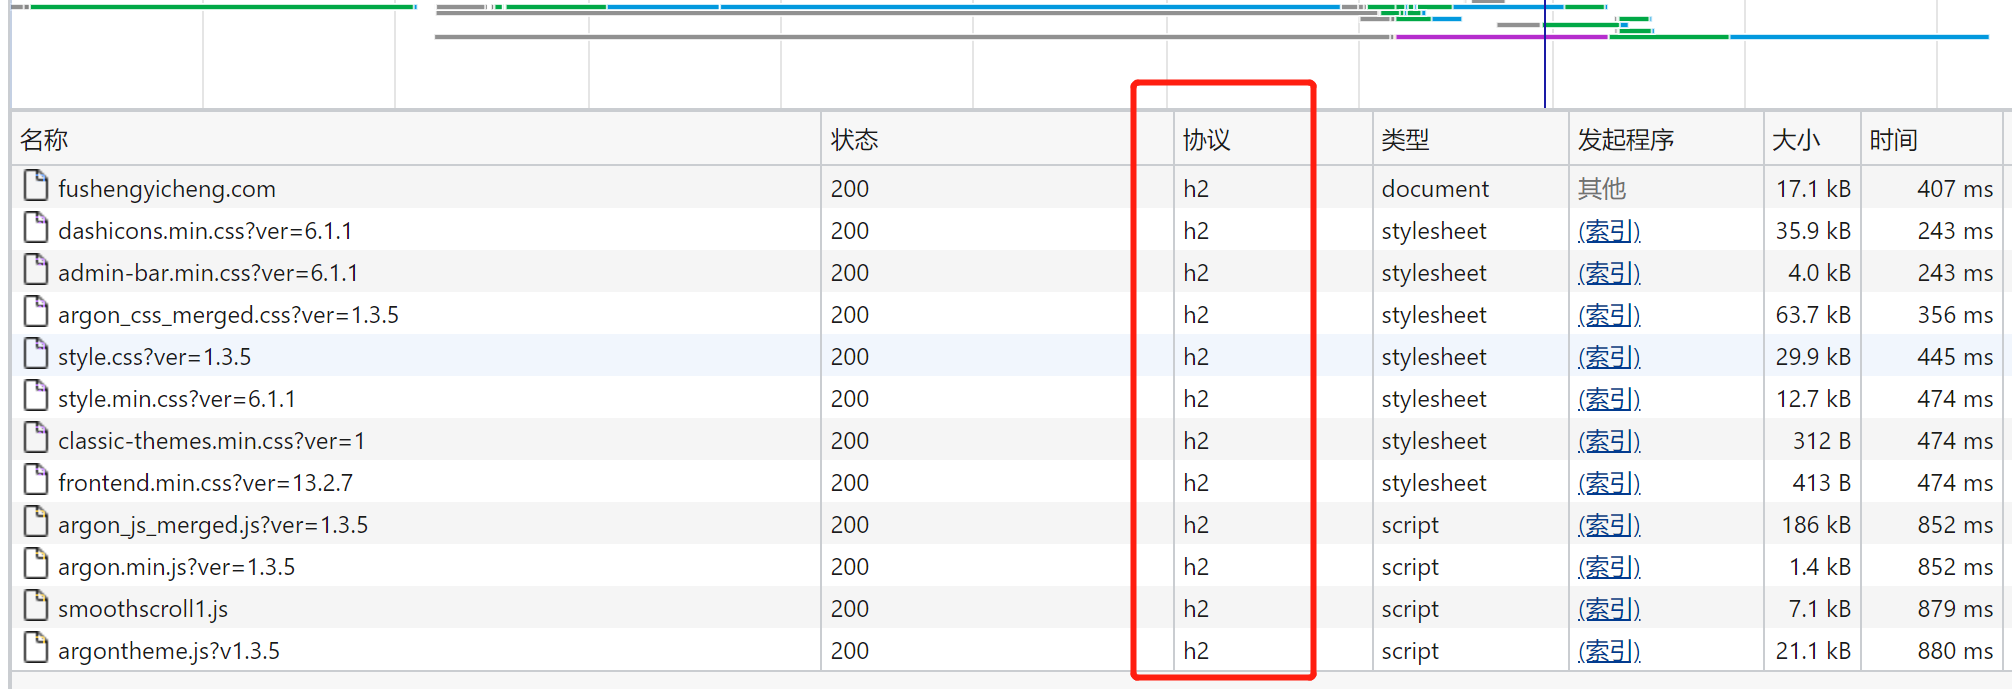
listen 443 ssl http2;nginx -s reload 重启nginx
打开浏览器查看,成功生效
参考文章
如何免费的让网站启用HTTPS